Using Time Series in a Spring Boot App on Predix

Introduction to Time Series
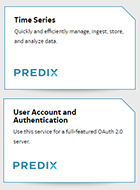
User Account and Authentication (UAA) is an identity management service in Cloud Foundry, used as an OAuth2 provider by the GE Predix platform. Being responsible for managing timed measurements, Time Series, in its turn, enables to efficiently and concurrently store data, as well as quickly retrieve it.
The Time Series service consists of two components: Data Ingestion and Data Query. The data-ingestion layer provides the ability to ingest real-time streaming data via WebSockets. The query API allows you to query data using a REST web service and supports grouping of data points by tags, time ranges, or values, and aggregations.
Both the ingestion and query requests must be authorized. The authorization in Time Series is based on two HTTP headers: Authorization and Predix-Zone-Id. The first one is the OAuth2 bearer token from the UAA instance bound to Time Series. The second header is the GUID of the same Time Series instance.
The ingestion of measurements is typically done by applications automatically, and users do not participate in authentication. So, for authentication, we will use the OAuth2 Client Credentials grant type that does not require interaction with a user.
Setting up the services
In this example, the services are configured from a Windows-based environment. The only Windows-specific command here is findstr, which is similar to the UNIX grep command.
Before getting started, install the Cloud Foundry and UAA CLIs. If you have already configured a UAA service instance, skip the steps related to it.
- Log in to Cloud Foundry.
- Create a UAA service instance.
- Get the GUID of the UAA instance.
- Create a Time Series service instance.
- Get the GUID of the Time Series instance.
- From
uaac, target your UAA instance. - Log in to the UAA instance.
- Create a client with authorities for accessing the Time Series instance.
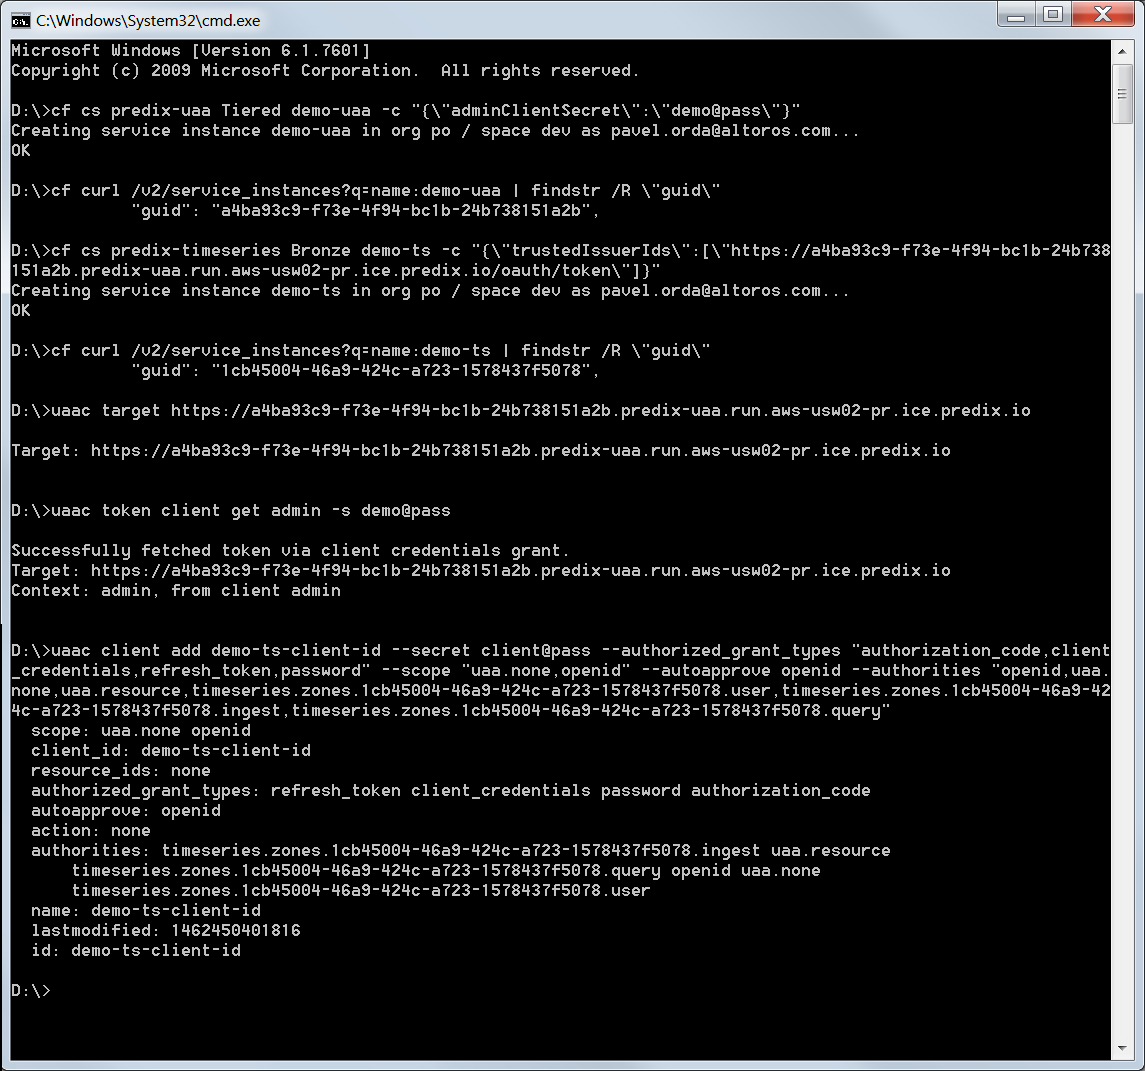
1 | cf login |
1 | cf cs predix-uaa Tiered demo-uaa -c "{\"adminClientSecret\":\"demo@pass\"}" |
1 | cf curl /v2/service_instances?q=name:demo-uaa | findstr /R \"guid\" |
1 | cf cs predix-timeseries Bronze demo-ts -c "{\"trustedIssuerIds\":[\"https://a4ba93c9-f73e-4f94-bc1b-24b738151a2b.predix-uaa.run.aws-usw02-pr.ice.predix.io/oauth/token\"]}" |
1 | cf curl /v2/service_instances?q=name:demo-ts | findstr /R \"guid\" |
1 | uaac target https://a4ba93c9-f73e-4f94-bc1b-24b738151a2b.predix-uaa.run.aws-usw02-pr.ice.predix.io |
1 | uaac token client get admin -s demo@pass |
1 | uaac client add demo-ts-client-id --secret client@pass --authorized_grant_types "authorization_code,client_credentials,refresh_token,password" --scope "uaa.none,openid" --autoapprove openid --authorities "openid,uaa.none,uaa.resource,timeseries.zones.1cb45004-46a9-424c-a723-1578437f5078.user,timeseries.zones.1cb45004-46a9-424c-a723-1578437f5078.ingest,timeseries.zones.1cb45004-46a9-424c-a723-1578437f5078.query" |
The same setup process can be done through the Predix UI:
Working with Time Series
Next, we create a Spring Boot application with a single dependency in the pom file:
<dependency>
 <groupid>org.springframework.boot</groupid>
 <artifactid>spring-boot-starter-web</artifactid>
</dependency>
This application will do REST calls to the Time Series service, so we need a REST client. We use Spring’s RestTemplate for the REST calls to the Time Series service, because it is easy to configure, and it has an extension with a support for OAuth2. We will skip authorization for now and put the required headers as constants in the properties file.
We have already got Predix-Zone-Id in the step 5 during the configuration. For Authorization, we will put "Bearer " + accessToken that can be retrieved by using the command below.
1 2 | uaac token client get demo-ts-client-id -s client@pass uaac context |
The headers can be added using ClientHttpRequestInterceptor.
@SpringBootApplication
public class Application {

@Value("${demo.timeseries.zoneId}")
String zoneId;

@Value("${demo.timeseries.accessToken}")
String accessToken;

@Bean
public RestTemplate restTemplate(){
   RestTemplate restTemplate = new RestTemplate();
   restTemplate.getInterceptors().add(headersAddingInterceptor());
   return restTemplate;
}

public ClientHttpRequestInterceptor headersAddingInterceptor() {
   return (request, body, execution) -> {
      request.getHeaders().set("Predix-Zone-Id", zoneId);
      request.getHeaders().set("Authorization", "Bearer " + accessToken);
      return execution.execute(request, body);
   };
}

public static void main(String[] args) {
   SpringApplication.run(Application.class, args);
}
}
A query controller
Now, we create a controller that can query data from the Time Series service.
For this demo, there will be a few mapped requests that only make calls to Time Series. A real-life app can collect data using such calls, as well as process and display it to users as different charts.
queryUrlPrefix is the URL to the Time Series query endpoint, and it is the same for all applications: https://time-series-store-predix.run.aws-usw02-pr.ice.predix.io/v1.
@RestController
@RequestMapping(produces = MediaType.APPLICATION_JSON_VALUE)
public class QueryController {

  @Value("${demo.timeseries.queryUrlPrefix}")
  private String queryUrlPrefix;

  @Autowired
  private RestTemplate restTemplate;

  @ExceptionHandler
  @RequestMapping(produces = MediaType.TEXT_HTML_VALUE)
  public Object exceptionHandler(HttpStatusCodeException e) {
      return e.getResponseBodyAsString();
  }

  @RequestMapping("/latest")
  public String queryLatestValues() throws Exception {
      String request = "{'tags':[{'name':'CPU usage'}]}";
      return restTemplate.postForEntity(queryUrlPrefix + "/datapoints/latest", request, String.class, emptyMap()).getBody();
  }

  @RequestMapping("/ordered")
  public String queryOrderedValues() throws Exception {
      String request = "{'start':'1y-ago','tags':[{'name':'CPU usage','order':'desc'}]}";
      return restTemplate.postForEntity(queryUrlPrefix + "/datapoints", request, String.class, emptyMap()).getBody();
  }
}
In addition, we have added exceptionHandler, which is very helpful if something goes wrong with the restTemplate call. In this case, it will return a more detailed message about the error received from the Time Series service to the user.
An ingestion controller
The ingestion controller is also a REST service, but unlike the query controller, it uses WebSockets to send data to the Time Series service. WebSockets in Time Series require the additional Origin header that can contain any value.
Here is the utility class that encapsulates connection opening.
public class WebSocketUtils {

  public static final String ZONE_ID_HEADER = "Predix-Zone-Id";
  public static final String LOCALHOST_URL = "http://localhost/";

  public static Session openWebSocket(String url, Object pojoEndpoint, String zoneId, String accessToken)
          throws DeploymentException, IOException {
      ClientEndpointConfig config = ClientEndpointConfig.Builder.create()
              .configurator(createConfigurator(zoneId, accessToken))
              .build();
      Endpoint endpoint = new PojoEndpointClient(pojoEndpoint, Collections.emptyList());
      WebSocketContainer container = ContainerProvider.getWebSocketContainer();
      return container.connectToServer(endpoint, config, URI.create(url));
  }

  public static ClientEndpointConfig.Configurator createConfigurator(final String zoneId, final String accessToken) {
      String authorizationToken = "Bearer " + accessToken;

      return new ClientEndpointConfig.Configurator(){
          @Override
          public void beforeRequest(Map<String, List<String>> headers) {
              addHeader(headers, ZONE_ID_HEADER, zoneId);
              addHeader(headers, HttpHeaders.AUTHORIZATION, authorizationToken);
              addHeader(headers, HttpHeaders.ORIGIN, LOCALHOST_URL);
          }

          private void addHeader(Map<String, List<String>> headers, String name, String value) {
              headers.computeIfAbsent(name, k -> new ArrayList<>()).add(value);
          }
      };
  }
}
You can see the application at this stage in this GitHub repository.
Implementing OAuth2 authorization
Now, it is time to replace the constants with the implementation of the OAuth2 authorization. The following additional dependencies are added.
<dependency>
 <groupid>org.springframework.boot</groupid>
 <artifactid>spring-boot-starter-security</artifactid>
</dependency>

<dependency>
 <groupid>org.springframework.security.oauth</groupid>
 <artifactid>spring-security-oauth2</artifactid>
</dependency>
As it was said above, two headers are needed for the authorization: Predix-Zone-Id and Authorization. The first one is the GUID of the Time Series instance. It does not change and can be stored as a constant. If an application is deployed to Predix and bound to the Time Series service, the Predix-Zone-Id header can be retrieved from the application environment variables.

The Authorization header is the OAuth2 bearer token that should be requested from the UAA instance according to the configured grant type. Luckily, this is already implemented in Spring’s OAuth2RestTemplate. By default, it is configured to work using the Authorization Code grant type, so we need to create another instance that will work with the Client Credentials type.
@SpringBootApplication
@EnableOAuth2Client
@EnableConfigurationProperties
public class Application {

...
@Bean
@ConfigurationProperties("security.oauth2.client")
public ClientCredentialsResourceDetails details() {
 return new ClientCredentialsResourceDetails();
}

@Bean
public OAuth2RestTemplate restTemplate(OAuth2ClientContext context, ClientCredentialsResourceDetails details) {
 OAuth2RestTemplate restTemplate = new OAuth2RestTemplate(details, context);
 restTemplate.getInterceptors().add(headersAddingInterceptor());
 return restTemplate;
}
...
}
Next, we add all parameters for the OAuth2 workflow to the properties.yml file.
demo.timeseries:
queryUrlPrefix: https://time-series-store-predix.run.aws-usw02-pr.ice.predix.io/v1
ingestUrl: wss://gateway-predix-data-services.run.aws-usw02-pr.ice.predix.io/v1/stream/messages
zoneId: 1cb45004-46a9-424c-a723-1578437f5078

security.oauth2.client:
clientId: demo-ts-client-id
clientSecret: client@pass
accessTokenUri: https://a4ba93c9-f73e-4f94-bc1b-24b738151a2b.predix-uaa.run.aws-usw02-pr.ice.predix.io/oauth/token
userAuthorizationUri: https://a4ba93c9-f73e-4f94-bc1b-24b738151a2b.predix-uaa.run.aws-usw02-pr.ice.predix.io/oauth/authorize
tokenName: oauth_token
In the query controller, Qualifier must be added for specifying the correct instance of RestTemplate to be used for sending requests to the Time Series endpoint.
@Autowired
@Qualifier("restTemplate")
private RestTemplate restTemplate;
In the WebSocket controller, the injected OAuth2RestTemplate is used to get the bearer token on the fly and add it as a header when connecting to the WebSocket endpoint.
@Autowired
@Qualifier("restTemplate")
private OAuth2RestTemplate restTemplate;

private String getAccessToken() {
  return restTemplate.getAccessToken().getValue();
}
That’s it.
Running the application
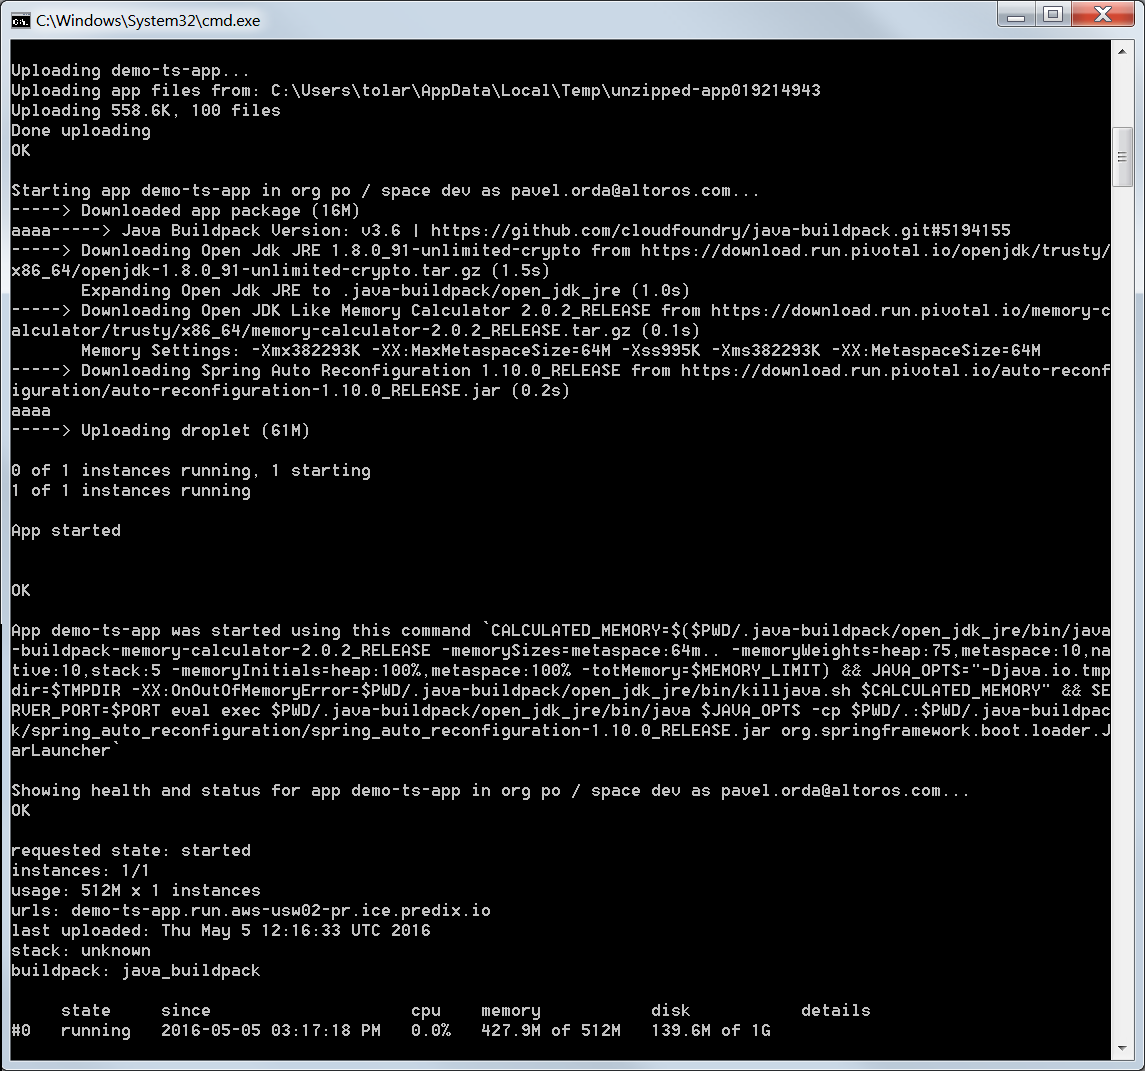
To start the application locally, use the following command.
1 | mvn spring-boot:run |
To run it on Predix, add this configuration to manifest.yml.
---
applications:
  - name: demo-ts-app
	buildpack: java_buildpack
	path: target/demo-ts-app.jar
	memory: 512m
Finally, you can run the application on Cloud Foundry using the following commands:
1 2 | mvn clean package cf push |
The source code for this demo application can be found in this GitHub repository. Visit the UAA documentation for more on User Account and Authentication in Predix.
Further reading
- How to Use Snap Packages when Collecting IoT Data with Predix Time Series
- Collecting Time-Series Data with Predix (a Golang API Wrapper Included)
- Configuring UAA to Provide a Single Entry Point for Kubernetes and Cloud Foundry