Adding a SQL Service to a .NET Application on IBM Bluemix

In this tutorial, we demonstrate how to connect a SQL service instance to an ASP.NET application in Bluemix. For doing so, we also deploy a Node.js application to use it as an API for accessing the database. You can find the source code from the tutorial on GitHub.
Prerequisites
Currently, Bluemix supports IBM DB2, PostgreSQL, ClearDB, dashDB, and ElephantSQL as SQL services, so in the article, I decided to concentrate on IBM DB2. I hope that one day Microsoft SQL Server will be also available among Bluemix services.
To follow the steps of this tutorial, you need:
- an IBM Bluemix account with a deployed ASP.NET application
- Node.js for Windows installed
- the IBM Bluemix CLI
- the Cloud Foundry CLI
See also:
Creating a SQL service in the Bluemix console
First, run the following command in the Command Prompt:
1 | cf services |
The command shows a list of services connected to your account. Because we haven’t created any, no services will be displayed.
Now, let’s create a service with this command:
1 | cf create-service sqldb sqldb_free sqlDb |
The command above adds a new SQL DB service instance named sqlDb and the sqldb_free plan.
Run the cf services command again to see whether your new service is created. Here is what you should get:
1 2 3 4 5 | cf services Getting services in org altoros.bluemix.test1@gmail.com / space dev as altoros.bluemix.test1@gmail.com… OK name service plan bound apps last operation sqlDB sqldb sqldb_free create succeeded |
The bound apps column is empty because we have created the service without connecting it to any Bluemix application. To solve this, I decided to connect the service to my ASP.NET 5 application. Sadly, after trying many different ways to bind them, I had no luck. To my surprise, I found out that the Bluemix SQL DB service does not support ASP.NET applications.
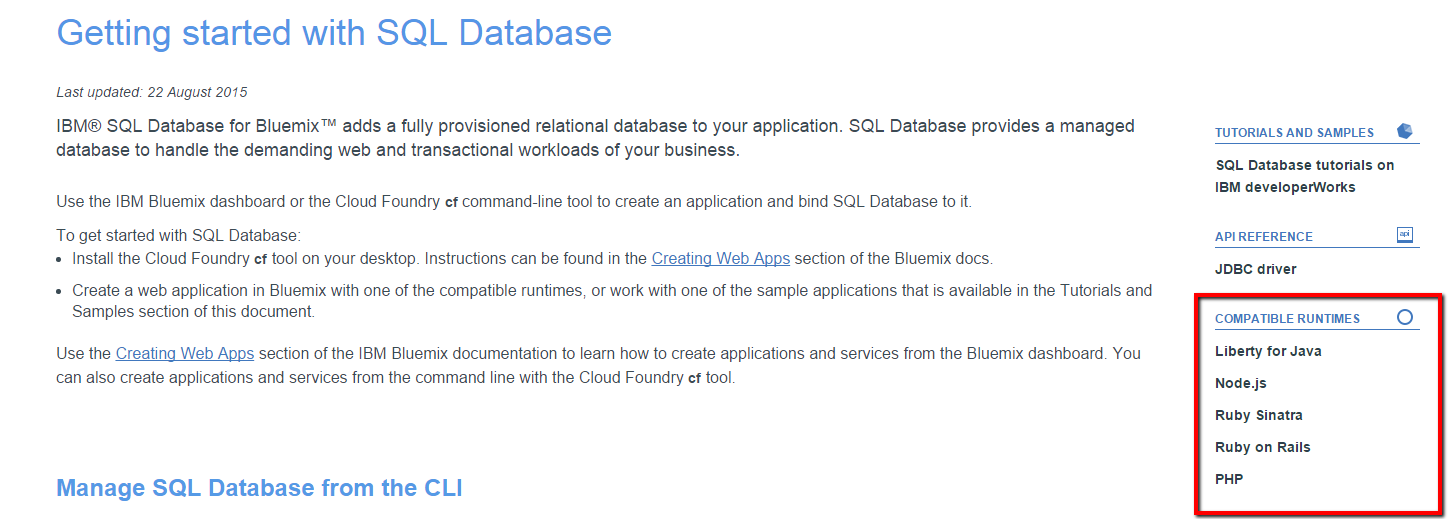
As you can see, there is no ASP.NET in the list of compatible runtimes at the moment. So, I chose the Node.js runtime for binding our SQL DB service to the ASP.NET application.
Creating a Node.js application for Bluemix
Now, let’s go to the Bluemix Dashboard. When there, create a new web application and select SDK for Node.js.
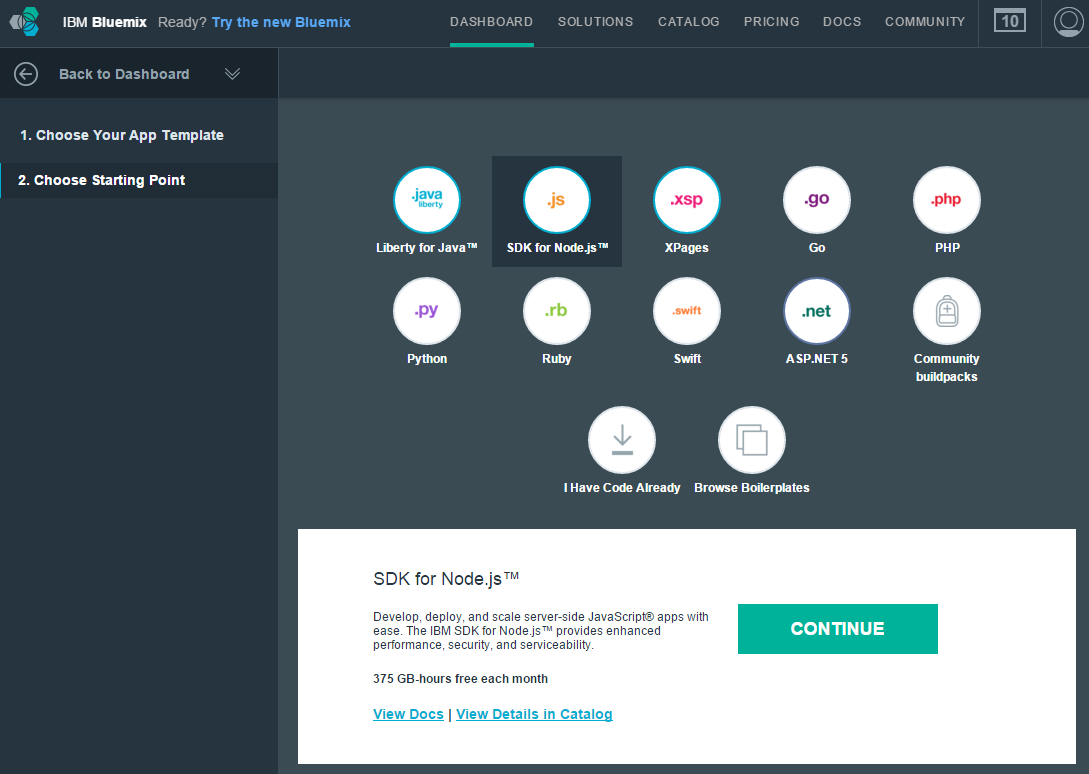
Then, choose a name for your application and press the Finish button. As a result, Bluemix will create a Node.js application and generate a link. This application will provide an API for accessing the database service that will be used in our ASP.NET 5 application.
I created a folder for my Node.js application with the package.json file in it. In this file, I added two Node.js modules: ibm_db and express. The second module is optional.
1 2 3 4 5 6 7 8 9 10 11 12 13 14 15 | { "name": "testNodeJsWithAspnet5", "scripts": { "start": "node app.js" }, ... "dependencies": { "ibm_db": ">=0.0.1", "express": ">=4.0.0" }, "engines": { "node": ">=0.10.3" } } |
Now, we can open the Command Prompt and change the current directory to the folder with the package.json file. Then, run the following command to install the required modules:
1 | npm install |
In the application folder, I created the app.js file based on this sample application. Here is the app.js code:
1 2 3 4 5 6 7 | var express = require('express'); var app = express(); var host = (process.env.VCAP_APP_HOST || 'localhost'); var port = (process.env.VCAP_APP_PORT || 3000); app.use('/cars', require('./routes/cars')); app.listen(port, host); |
I chose port 3000, but you can use a different port number. Also, I created the routes folder and added the cars.js file to it. The .js file has the /cars/all API method that retrieves all cars from the database. The key parts of the cars.js file are the following:
1 2 3 4 5 6 7 8 9 10 11 12 13 14 15 16 17 18 19 20 21 22 23 24 25 | var ibmdb = require('ibm_db'); var express = require('express'); var router = express.Router(); router.get('/all', function (req, res) { res.writeHead(200, { 'Content-Type': 'application/json' }); var env = null; var key = -1; var serviceName = 'SQLDB'; if (process.env.VCAP_SERVICES) { env = JSON.parse(process.env.VCAP_SERVICES); key = findKey(env, serviceName); } var credentials = env[key][0].credentials; var dsnString = 'DRIVER={IBM DB2 ODBC DRIVER};DATABASE=' + credentials.db + ';UID=' + credentials.username + ';PWD=' + credentials.password + ';HOSTNAME=' + credentials.hostname + ';port=50001;PROTOCOL=TCPIP;Security=ssl'; ibmdb.open(dsnString, function (err, conn) { var sqlQuery = 'SELECT Id, Model, Color FROM Cars'; conn.query(sqlQuery, function (err, data) { res.write(JSON.stringify(data)); conn.close(function () { response.end(); }); }); }); }); |
The code above is a short version intended for understanding the main idea. The full version of the Node.js application can be found on GitHub.
To access the SQL DB instance from the Node.js application, we need to get the database credentials using the process.env.VCAP_SERVICES variable that contains the database name, username, password, hostname, and other related information.
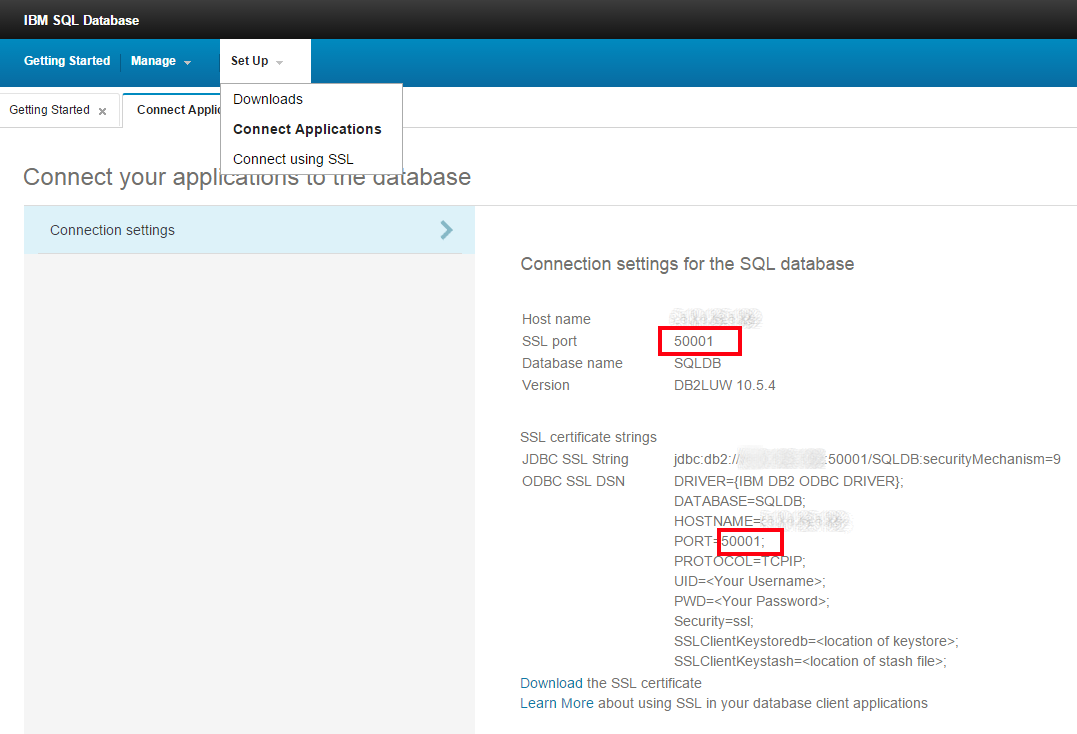
Note: The port number in the VCAP_SERVICES variable is different from the one that we use in the Node.js application. To retrieve the correct port number, go to the Bluemix console, find the SQL DB service, and then launch the Database console.
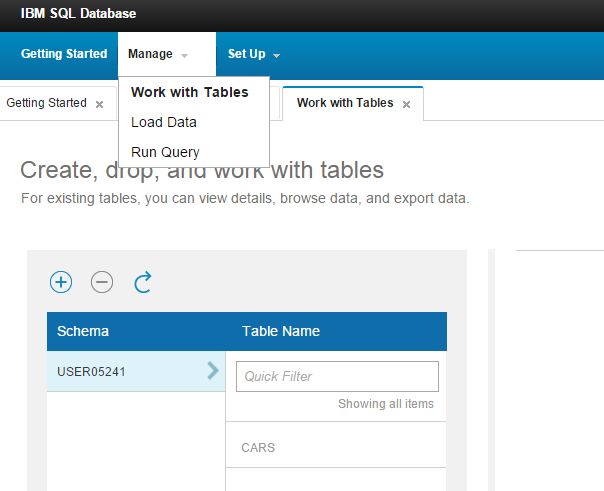
While we are in the Database console, create the Cars table and add some data rows.
To finish with Node.js, do the last two steps in the Command Prompt:
Deploy your application:
1cf push testNodeJsWithAspnet5 -b https://github.com/cloudfoundry/nodejs-buildpackBind the SQL DB service to the Node.js application:
1cf bind-service testNodeJsWithAspnet5 sqlDbwhere:
testNodeJsWithAspnet5is the name of the Node.js application.sqlDbis the name of the SQL DB service instance.
Now, we can open the Node.js application using the Bluemix URL and see the data from the Cars table created earlier.

Calling a Node.js API from an ASP.NET application
So far, we have a Node.js API with the /cars/all method that can be easily used in our ASP.NET application. I have updated the Index action in my HomeController.cs:
1 2 3 4 5 6 7 8 | public async Task<IActionResult> Index() { using (var client = new HttpClient()) { var result = await client.GetStringAsync("http://testnodejswithaspnet5.eu-gb.mybluemix.net/cars/all"); return Json(result); } } |
Finally, we deploy the updated ASP.NET application to Bluemix:
1 | cf push eugenetestaspnet5 -b https://github.com/cloudfoundry-community/asp.net5-buildpack.git |
Conclusion
Because Microsoft SQL Server is not available in Bluemix, I integrated the IBM SQL DB service into my ASP.NET application. At the moment, the ASP.NET runtime is not supported by SQL DB, so you need to have a sort of API to access the database.
In my future posts, I will show how to work with different services from a Bluemix ASP.NET application.