Continuous Integration and Continuous Delivery in IBM Bluemix

IBM Bluemix provides several services based on Platform-as-a-Service (PaaS) powered by Cloud Foundry, containers, and VMs. In this post, I’ll show you how to configure continuous integration (CI) and continuous delivery (CD) in IBM Bluemix using a complex Node.js app as an example.
Why read this?
Wouldn’t you like to have your app automatically built, tested, and available online ready for a demo, UAT (User Acceptance Test), or just ‘ALWAYS’ have a running version somewhere without having to do anything at all? By the end of this article, you’ll have a complex Node.js app automatically built, tested, and deployed.
Our example application will also use Node-RED.
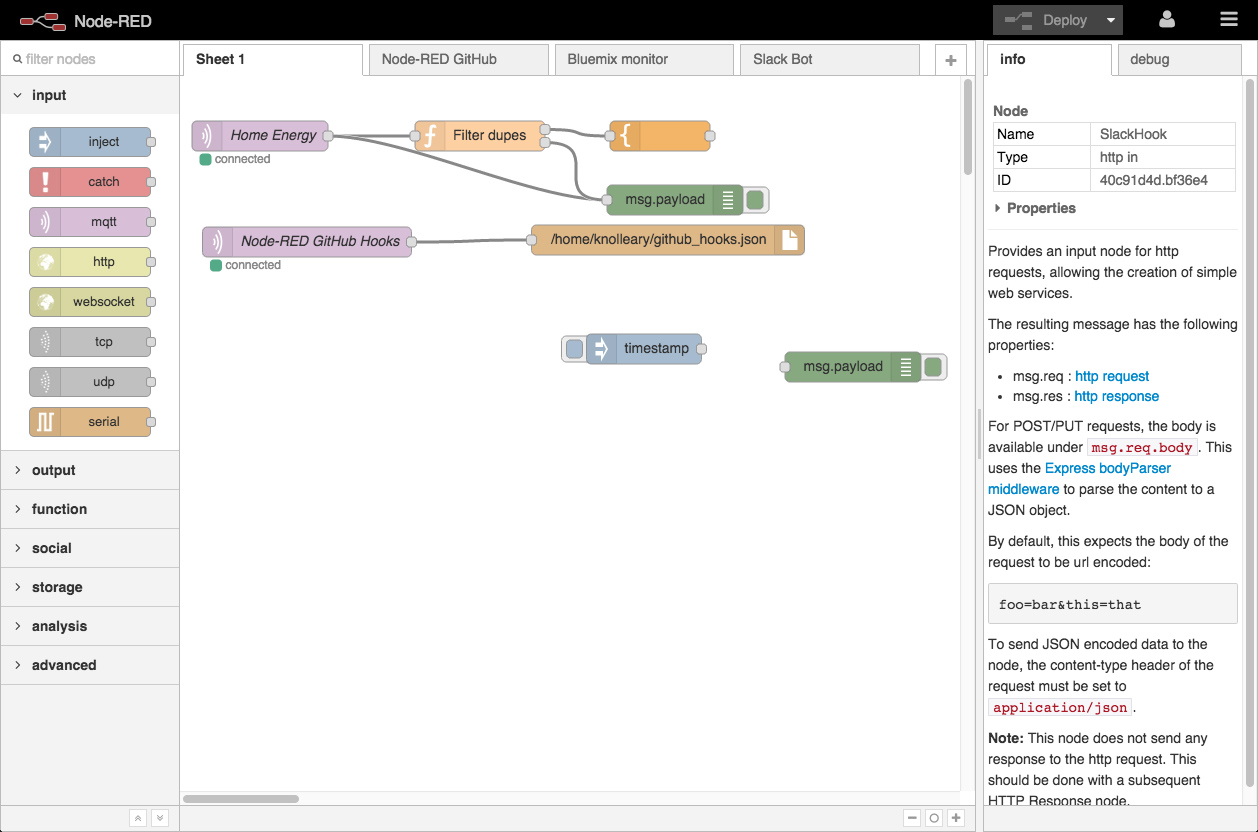
Node-RED is a visual tool from IBM for wiring the Internet of Things. It has a few tweaks I’ve initiated to make it PaaS-friendly (retrieve the port number where it should listen from the PORT environment variable).
Continuous integration and continuous delivery
There are dozens of CI/CD tools out there (Travis, Codeship, Jenkins, etc). I’ll focus on IBM Bluemix DevOps Services, which is tightly integrated with Bluemix, making deployments extremely easy.
If you want to understand CI/CD in a couple of minutes, here is a three-minute video on DevOps Services. I also suggest reading this book to get a deeper knowledge about this extremely important agile practice.
Bluemix + DevOps Services + Node-RED
If you don’t have an account already, sign up for free in Bluemix. Also, you have to get access to DevOps Services.
I went through the required initial steps:
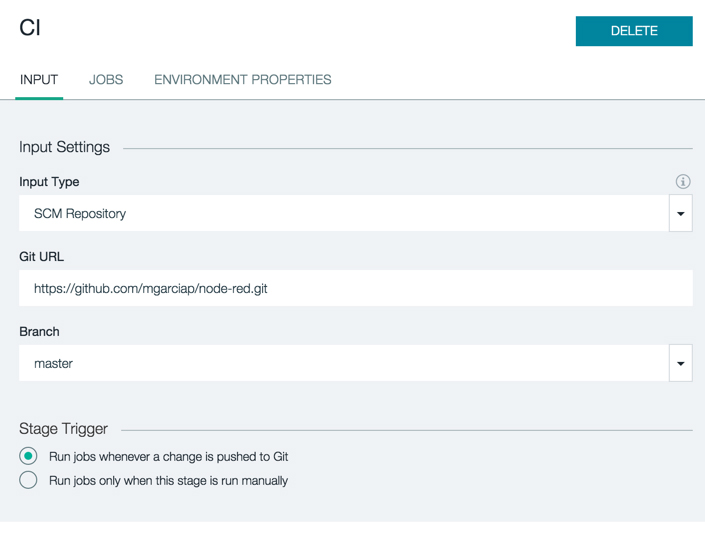
- Created a New Project (options are Git from GitHub, Bluemix, or Jazz SCM on Bluemix). I chose GitHub. Then, I authorized the integration and selected my repo (in this case: https://github.com/mgarciap/node-red).
- Configured GitHub hooks to integrate commits with IBM Bluemix DevOps Services.
It is time to configure the pipelines.
Select the project and go to the ‘Build and Deploy’ menu.

Of course, there won’t be any pipeline’s stages, so go on and create one (you’ll see what the stage definition is on the page). Let’s create a very simple pipeline containing three stages as follows:
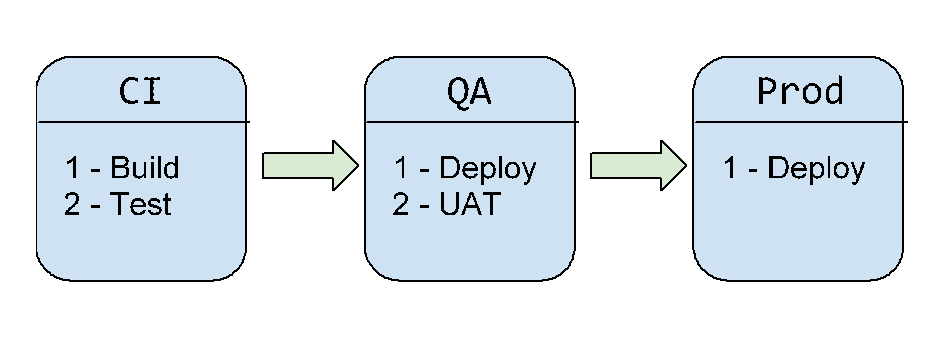
Stage #1: Continuous integration
To keep it simple and as there is no special requirement, I’ll create two steps in one job. Also, I removed one test suite, because it depends on the local file system rights.
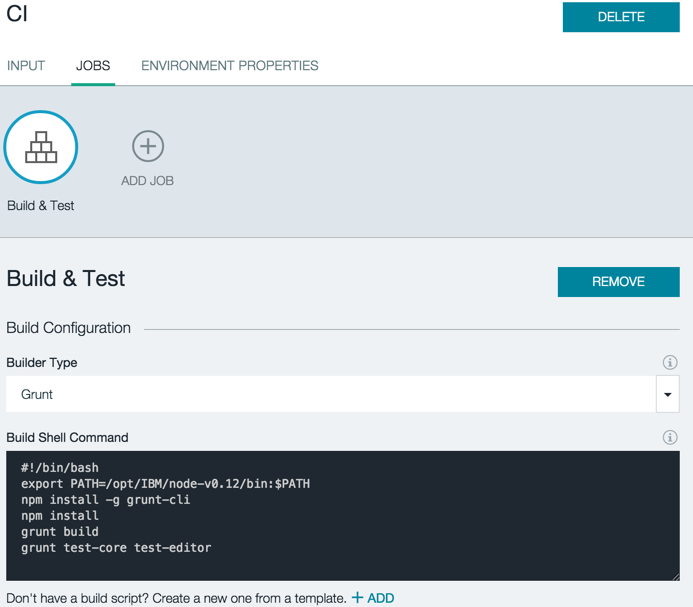
Save and test it, either by pushing something to your repo or manually.
Stage #2: Quality assurance
Now, the most interesting part: to automatically deploy the app to Bluemix on every successful build.
- Add a new Stage.
- Add a ‘Deploy’ job and make sure to select ‘Cloud Foundry’ as a Deployer Type.

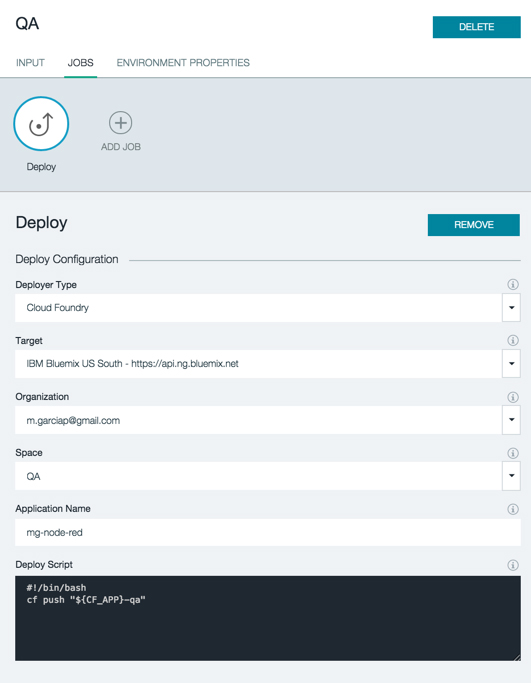
A few notes:
- It is a good practice to deploy apps to its corresponding CF space, so go on and create a new one in the same drop-down menu.
- I appended ‘-qa’ to the application name in the Deploy Script, so this name can later be used as the domain name route
http://mg-node-red-qa.mybluemix.net.
Voila, there you go, deployment is done!
Stage #3: Production
Now, you should be able to create this stage by yourself. In this case, I would suggest you to run this stage manually, for example, after the User Acceptance Tests have finished. Just select ‘Run jobs only when this stage is run manually’ as the Stage Trigger.
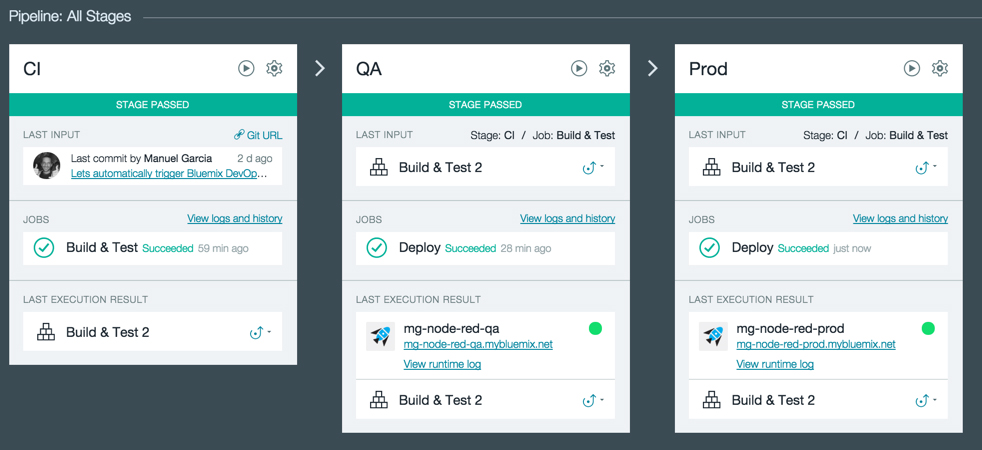
Pipeline overview
Here is how my pipeline looks like after creating each stage:
Conclusion
THE GOOD. IBM Bluemix DevOps Services have a very nice dashboard integrated with other IBM tools and services. It is highly integrated with Bluemix making deployments straightforward. Last but not least, you have full access to the Cloud Foundry CLI right from the Deploy scripts. This brings a lot of power to engineers.
THE BAD. Registration to IBM services is not straightforward and takes time. I would say it is very complicated compared to other competing platforms. Besides, I didn’t find a way to configure pipeline events notifications. There is no way I could know if tests, builds, or deployments are failing. It is important to be aware that these IBM’s CI/CD tools are only integrated with Bluemix, so you get into a ‘lock-in’ situation and cannot use them without this platform.
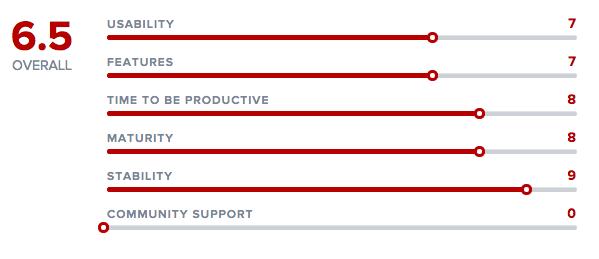
The author’s rating:
THE BOTTOM LINE. The CI/CD process is quite easy with Bluemix, and now you can have your app automatically built, tested, and deployed. However, I would also recommend to have a look at solutions such as Codeship, which recently announced Cloud Foundry integration.