Creating a Sample Service Broker for Cloud Foundry with Python’s Flask

Two ways of provisioning services
The Cloud Foundry PaaS sets the scene for not just running cloud-native apps, but also for provisioning services these apps depend on. Services like databases, storage, or queues can be provisioned to applications on demand. So, whenever an app requires access to a service, there are two options:
- Connect it to a user-provided service instance
- Connect it to a managed service via the marketplace
User-provided service instances enable developers to use services that are not available in the marketplace with their applications running on Cloud Foundry. Managed services, in their turn, are integrated with Cloud Foundry via APIs, provisioning reserved resources and credentials to end users on demand.
There are quite a number of service brokers for well-known services available in the marketplace, including MySQL, MongoDB, or Redis. However, what do you do when there is no service broker for the service you need? You can create it.
What’s needed to create?
This diagram demonstrates the process of creating a service broker:
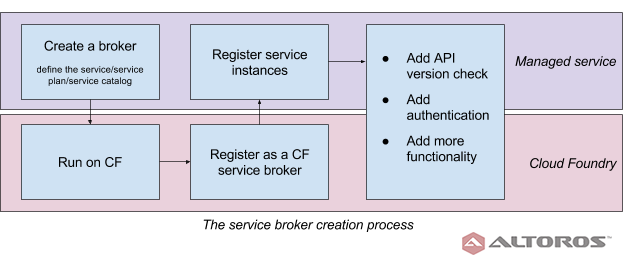
In the Service Broker API documentation, a service broker is defined as “the component of the service that implements the Service Broker API, for which a platform’s marketplace is a client. Service brokers are responsible for advertising a catalog of service offerings and service plans to the marketplace, and acting on requests from the marketplace for provisioning, binding, unbinding, and deprovisioning.”
“The Service Broker API defines an HTTP interface between the services marketplace of a platform and service brokers.” So, what we need to create is an HTTP service.
As an example, we are going to create a service broker app using Python’s Flask framework, which is easy to read and translate to the preferable programming language.
Prerequisites
To create a managed service for Cloud Foundry:
- We’ll need a Cloud Foundry instance to test the service broker.
- We must have admin access to this Cloud Foundry instance to manage service brokers and the services marketplace catalog.
In this post, we target Service Broker API v2.11.
Defining the service and the service plan
The first thing to do is define the service and its service plan in terms of code. So, we need to advertise at least one service with at least one service plan. In the simplest case, it looks like this:
plan_one = {
    "id": "plan_one",
    "name": "plan_one",
    "description": "Simple free plan",
    "free": True
}

my_service = {
    'id': 'example_service',
    'name': 'example_service',
    'description': 'Simple service example',
    'bindable': True,
    'plans': [plan_one]
}
Defining the service catalog
Defining the first endpoint—the service catalog—in our case looks like this:
my_services = {"services": [my_service]}

@app.route('/v2/catalog')
def catalog():
    return jsonify(my_services)
The final code of the service broker app:
import os
from flask import Flask, jsonify

app = Flask(__name__)

log = app.logger

# Service plans
plan_one = {
    "id": "plan_one",
    "name": "plan_one",
    "description": "Simple free plan",
    "free": True
}

# Services
my_service = {
    'id': 'example_service',
    'name': 'example_service',
    'description': 'Simple service example',
    'bindable': True,
    'plans': [plan_one]
}

my_services = {"services": [my_service]}

@app.route('/v2/catalog')
def catalog():
    return jsonify(my_services)

if __name__ == "__main__":
    app.run(host='0.0.0.0', port=int(os.getenv('VCAP_APP_PORT', '5000')))
That’s it! The code is ready to run and advertise our example service (example_service) with one service plan (plan_one). It can’t perform anything yet, but it is a bare minimum of the code that can be accepted by Cloud Foundry.
Running the service broker app on CF
In this example, the code is run on Cloud Foundry, which is, nevertheless, not imperative. In fact, the service broker is just a component of the service. We run the service broker app on Cloud Foundry by either typing the code, or checking it out from our GitHub:
1 2 3 4 | git clone https://github.com/Altoros/simple-service-broker-for-cf.git cd simple-service-broker-for-cf git checkout first cf push |
Registering the app as a service broker
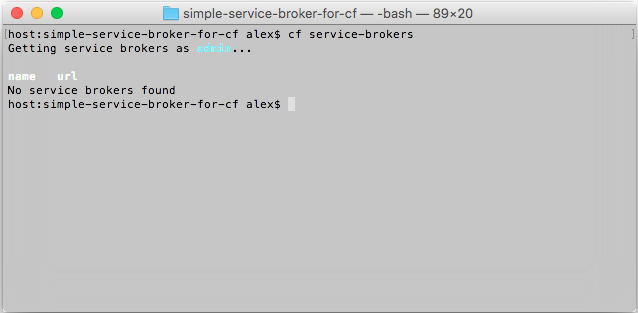
Now, we have to register the application as a service broker with Cloud Foundry. Let’s check what service brokers we already have available. In our case, there is none:
Let’s create a Cloud Foundry service broker:
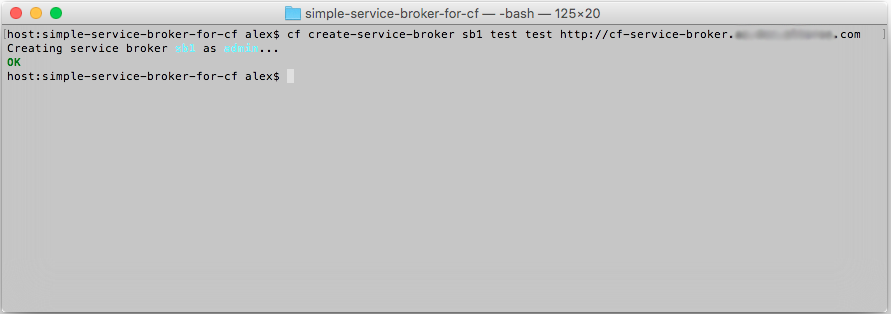
Note that we are using BOSH Lite for this example. If you are using a full-scale Cloud Foundry deployment, your application domain may differ.
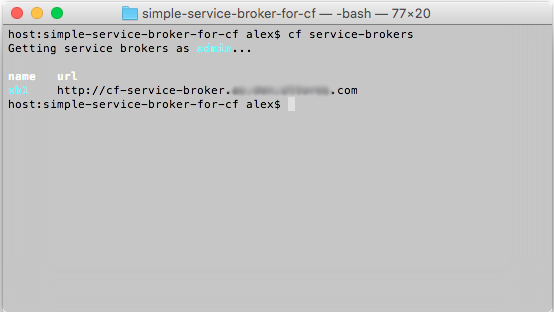
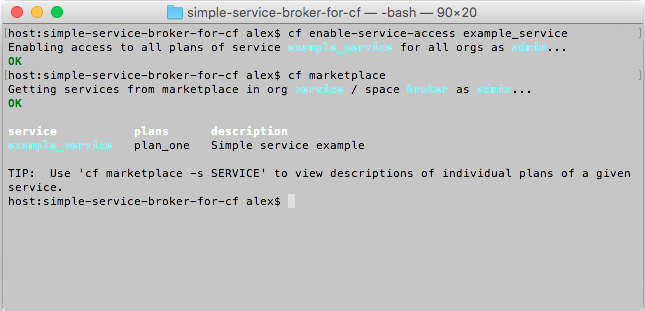
Let’s check what we’ve got now:
The next step is to make the service accessible by org/space:
Registering service instances
If we now try registering a service instance within that service, we will fail:
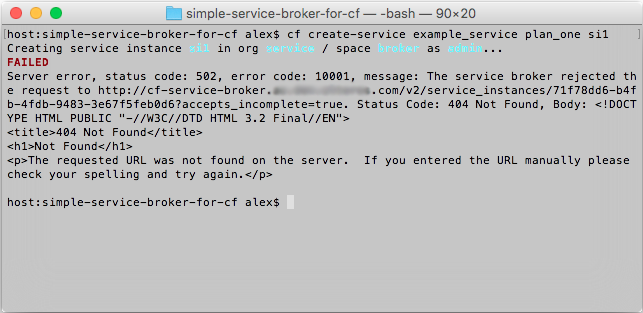
It happens because we haven’t provided support for this action in the code yet. So, let’s extend the code to support instances:
@app.route('/v2/service_instances/<instance_id>', methods=['PUT', 'DELETE',
           'PATCH'])
def service_instances(instance_id):
    if request.method == 'PUT':
        return make_response(jsonify({}), 201)
    else:
        return jsonify({})
Adding this endpoint allows us to define the actual logic for creating, updating, and deleting service instances. We can type this code, or check it out from Git:
1 | git checkout service |
Having added this endpoint, we now need to restart (and, since running on Cloud Foundry, restage) the instance of the service broker:
1 | cf push |
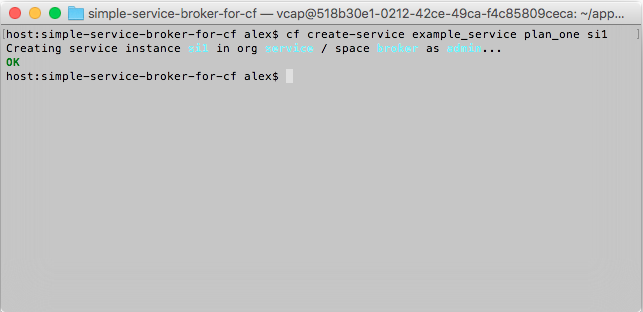
At this point, we are ready to create an instance of the service (actually, nothing is going to happen in our case, but the broker will respond with the 201 status code, making Cloud Foundry believe that the broker has successfully created an instance of the service).
Let’s create an instance of example_service with the service plan plan_one, where si1 is the name of the instance:
Adding API version check
According to the Service Broker API documentation, “requests from the platform to the service broker must contain a header that declares the version number of the Service Broker API that the marketplace will use X-Broker-Api-Version: 2.11.”
So, let’s enable the broker to check the API version number.
X_BROKER_API_MAJOR_VERSION = 2
X_BROKER_API_MINOR_VERSION = 10
X_BROKER_API_VERSION_NAME = 'X-Broker-Api-Version'

def api_version_is_valid(api_version):
    version_data = api_version.split('.')
    result = True
    if (float(version_data[0]) < X_BROKER_API_MAJOR_VERSION or
       (float(version_data[0]) == X_BROKER_API_MAJOR_VERSION and
       float(version_data[1]) < X_BROKER_API_MINOR_VERSION)):
                result = False
    return result

def requires_api_version(f):
    @wraps(f)
    def decorated(*args, **kwargs):
        api_version = request.headers.get('X-Broker-Api-Version')
        if (not api_version or not (api_version_is_valid(api_version))):
            abort(412)
        return f(*args, **kwargs)
    return decorated

@app.errorhandler(412)
def version_mismatch(error):
    return 'Version mismatch. Expected: {}: {}.{}'.format(
        X_BROKER_API_VERSION_NAME,
        X_BROKER_API_MAJOR_VERSION,
        X_BROKER_API_MINOR_VERSION), 412
Now, we can style the endpoints:
@app.route('/v2/catalog')
@requires_api_version
def catalog():
....
The code can either be typed or checked out from Git:
1 2 | git checkout api cf push |
Adding authentication
According to the Service Broker API documentation, “the marketplace must authenticate with the service broker using HTTP basic authentication (the Authorization: header) on every request. The broker is responsible for validating the username and password and returning a 401 Unauthorized message if credentials are invalid. It is recommended that brokers support secure communication from platform marketplaces over TLS.”
So, let’s make our broker a little more secure:
def check_auth(username, password):
    """This function is called to check if a username /
    password combination is valid.
    """
    if not (username == 'alex' and password == 'bigsecret'):
        log.warning('Authentication failed')
    return username == 'alex' and password == 'bigsecret'

def authenticate():
    """Sends a 401 response that enables basic auth"""
    return Response('Could not verify your access level for that URL.\n'
                    'You have to login with proper credentials', 401,
                    {'WWW-Authenticate': 'Basic realm="Login Required"'})

def requires_auth(f):
    """Cloud Controller (final release v145+) authenticates with the Broker
    using HTTP basic authentication (the Authorization: header) on every
    request and will reject any broker registrations that do not contain a
    username and password. The broker is responsible for checking the username
    and password and returning a 401 Unauthorized message if credentials are
    invalid.
    Cloud Controller supports connecting to a broker using SSL if additional
    security is desired."""
    @wraps(f)
    def decorated(*args, **kwargs):
        auth = request.authorization
        if not auth or not check_auth(auth.username, auth.password):
            return authenticate()
        return f(*args, **kwargs)
    return decorated
Now, we can style the endpoints:
@app.route('/v2/catalog')
@requires_auth
@requires_api_version
def catalog():
....
We can either type this code, or check it out from Git:
1 2 | git checkout auth cf push |
To make sure it works as expected, we’ll delete all service instances and the service broker itself:
1 2 3 | cf delete-service si1 cf disable-service-access example_service cf delete-service-broker sb1 |
Now, if we try registering the service broker the way we did before, we will fail:
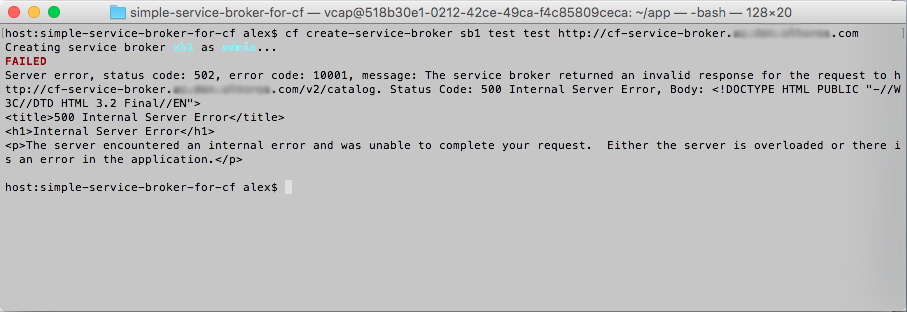
Registration fails because the credentials for this service broker have been changed. Let’s try using new credentials:
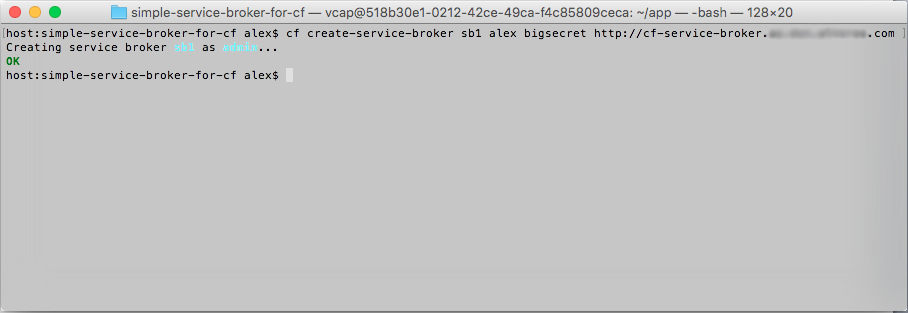
This is quite a simple example of creating a service broker. However, it is good enough to get an idea of how it works. Now, you can move on adding more functionality.
You can access the source code of the developed service broker here.
Related reading
- Introducing a Cloud Foundry Service Broker for HP IDOL
- Creating a Custom Cloud Foundry Buildpack from Scratch: What’s Under the Hood
This blog post was written by Alexey Zakharov and Aliaksandr Prysmakou.