Getting Started with a CPU-Enabled TensorFlow Instance on AWS

TensorFlow supports deployment to one or more CPUs or GPUs in a single machine. In this tutorial, we focus on installing the CPU version of TensorFlow on Amazon Elastic Compute Cloud.
Software requirements
To get started with TensorFlow, your environment requires a certain amount of pre-installed software.
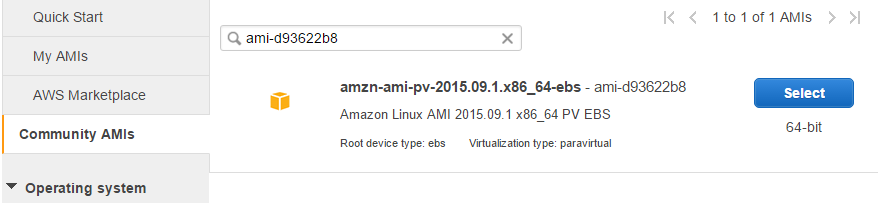
The chosen for the tutorial ami-d93622b8 contains the majority of the necessary software, including Python, pip, and glibc. On your part, you need to install the gcc compiler when following the instructions below.
Creating an instance on AWS
- Create the AWS instance from ami-d93622b8.
- Choose the instance type. For the tutorial, c3.2xlarge with 16 GB of SSD is used.

- Configure a security group and other instance details.
- Generate (or reuse) a key pair for access to the instance.
Note: When creating the tutorial, three other AMIs—Amazon ECS-Optimized Amazon Linux AMI, CentOS 7 (x86_64) with Updates HVM, and amzn-ami-hvm-2013.09.2.x86_64-s3—were tested. However, TensorFlow installation using these AMIs was unsuccessful.
Configuring an environment
- Log in to the remote instance via SSH with the default username—ec2-user.
- Check Python and pip availability: 12python --versionpip --version
- Install the
gcccompiler:1sudo yum install gcc - Install TensorFlow: 1sudo pip install
- Check whether the configured environment is correct in a Python terminal:
$ python
>>> import tensorflow as tf
>>> hello = tf.constant('Hello, TensorFlow!')
>>> sess = tf.Session()
>>> print sess.run(hello)
Hello, TensorFlow!
>>> a = tf.constant(10)
>>> b = tf.constant(32)
>>> print sess.run(a+b)
42
Running a sample
- Install Git: 1yum install git -y
- Clone the project: 1git clone --recurse-submodules https://github.com/tensorflow/tensorflow
- Run the TensorFlow neural net model: 1python tensorflow/tensorflow/models/image/mnist/convolutional.py123456789101112131415161718192021Initialized!Epoch 0.00Minibatch loss: 12.054, learning rate: 0.010000Minibatch error: 90.6%Validation error: 84.6%Epoch 0.12Minibatch loss: 3.285, learning rate: 0.010000Minibatch error: 6.2%Validation error: 7.0%Epoch 0.23Minibatch loss: 3.473, learning rate: 0.010000Minibatch error: 10.9%Validation error: 3.7%Epoch 0.35Minibatch loss: 3.221, learning rate: 0.010000Minibatch error: 4.7%Validation error: 3.2%Epoch 0.47Minibatch loss: 3.193, learning rate: 0.010000Minibatch error: 4.7%Validation error: 2.7%
Using TensorBoard
You may also employ a visualization tool called TensorBoard.
- Add
/usr/local/bintoPATHvia.bashrc:PATH=$PATH:$HOME/bin:/usr/local/bin
- Copy the TAG file: 1sudo cp -R /home/ec2-user/tensorflow/tensorflow/tensorboard/TAG /usr/local/lib/python2.7/site-packages/tensorflow/tensorboard/TAG
- Copy the
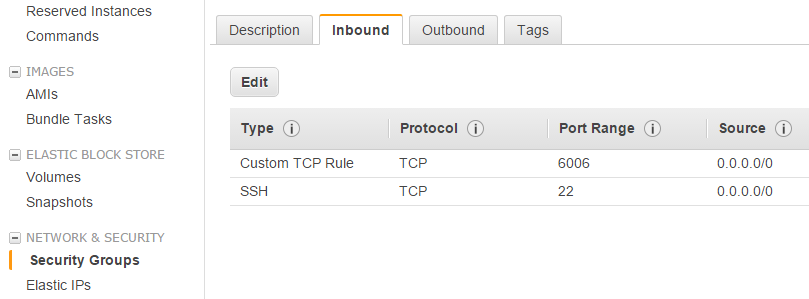
favicon.icofile into the TensorBoard folder:1sudo cp favicon.ico /usr/local/lib/python2.7/site-packages/tensorflow/tensorboard/ - Update the AWS security group. The inbound TCP port 6006 must be opened.
- Run TensorBoard on the server:1tensorboard --logdir /var/log
- Open TensorBoard in a browser:
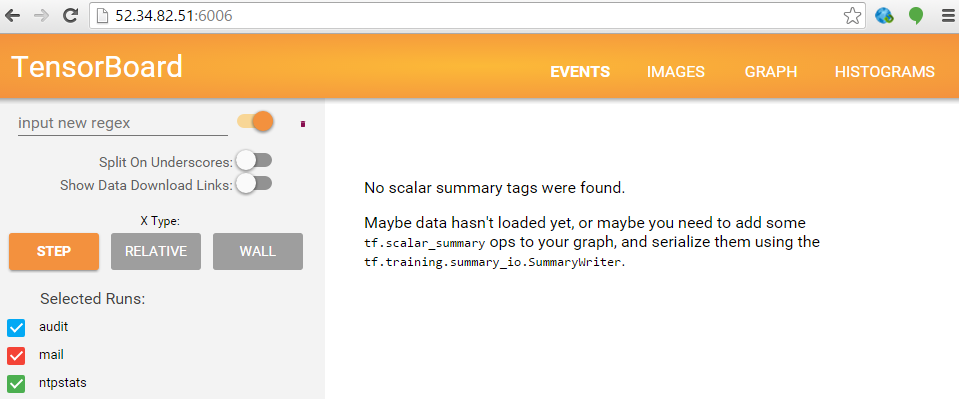
As a result, you have your CPU version of TensorFlow and TensorBoard available and ready to use on AWS.
For many types of tasks, the GPU version of TensorFlow demonstrates higher performance. At the same time, it requires additional hardware and software.
Further reading
- Basic Concepts and Manipulations with TensorFlow
- Visualizing TensorFlow Graphs with TensorBoard
- TensorFlow in the Cloud: Accelerating Resources with Elastic GPUs
- Performance of Distributed TensorFlow: A Multi-Node and Multi-GPU Configuration
About the author
Evheny Shaliov is a software developer at Altoros with 5+ years of experience in architecture design and database development. He has strong skills in building microservices-based architectures that use NoSQL data stores. Evheny is a teaching assistant in Belarusian State University of Informatics and Radioelectronics; he’s also studying for a PhD in information security.