Deploying Kibana to IBM Bluemix for Exploring Elasticsearch Data


This tutorial provides instructions on how to deploy Kibana, an open-source analytics and visualization platform for searching, viewing, and interacting with data stored in Elasticsearch indices, to IBM Bluemix.
The guidelines can be used for scenarios when you set up Kibana in the Bluemix environment and it is not possible to work with the platform outside the PaaS because of security limitations or other reasons.
Prerequisites
To follow the steps of this tutorial, you need:
- a Bluemix account
- a Kibana package downloaded to your local machine
Kibana is a Node.js application. You can find its starting command in .\bin\kibana. Before deploying Kibana to Bluemix, prepare your Bluemix environment:
- create a Bluemix application for Kibana
- install Bluemix and Cloud Foundry CLIs
- create an Elasticsearch instance or use the existing one
Find the details on how to set up the Bluemix environment in this guide (“Kibana on IBM Bluemix: How to Deploy and Use for Visualization of Elasticsearch Data”).
When choosing a Kibana version to download from Elastic, keep in mind the target OS and the version of Elasticsearch. In this post, I use Kibana 4.3.1 for Linux that is compatible with Elasticsearch 2.1. See the release notes.
Adapting Kibana for Bluemix
To run Kibana in Bluemix, you need to customize the downloaded Kibana package to make it ready for deployment to the Cloud Foundry-based platform.
Kibana port
The first change is related to the port used for running Kibana.
Normally, you should set the port in the ./config/kibana.yml configuration file before starting Kibana. If it is not set, port 5601 is used by default. Because we are going to run Kibana in Bluemix that assigns a random available port to an application during deployment, specifying the port value in the Kibana configuration becomes problematic. We just can’t know the port number in advance.
To solve this, change the ./src/server/config/schema.js script in the following way:
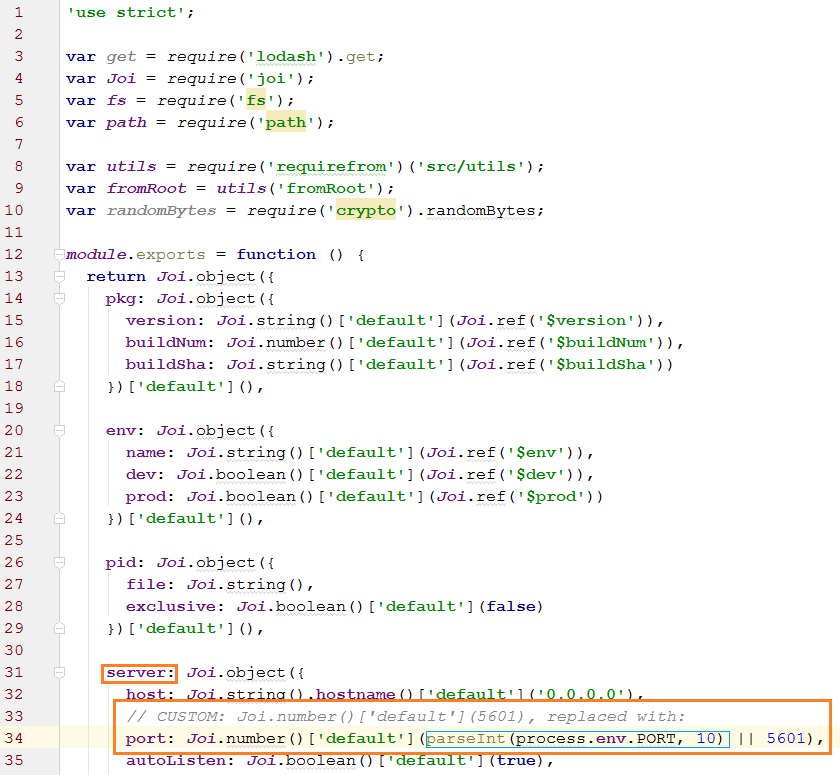
The idea of the change is to get the port value from the process.env.PORT environment variable if it is not specified in the configuration file. We use this variable because Bluemix sets it for an application when assigning the port to it.
With this change, you should not define server.port in the configuration file when deploying Kibana to Bluemix.
Elasticsearch URL
The next Kibana configuration property we are interested in is the Elasticsearch URL.
If you use an original Elasticsearch instance (not a built-on-top service), then you can just set its URL in the Kibana configuration. Skip the instructions below and go straight to the Kibana configuration section.
In my case, I work with the Searchly service that is hosted in Bluemix. Its URL can change (for example, because of service redeployment), so hard coding the URL in the Kibana configuration is not the best choice. Instead, I change Kibana to retrieve the bound Elasticsearch service and get the URL from its details. To achieve this, do the following change in the ./src/plugins/elasticsearch/index.js script:
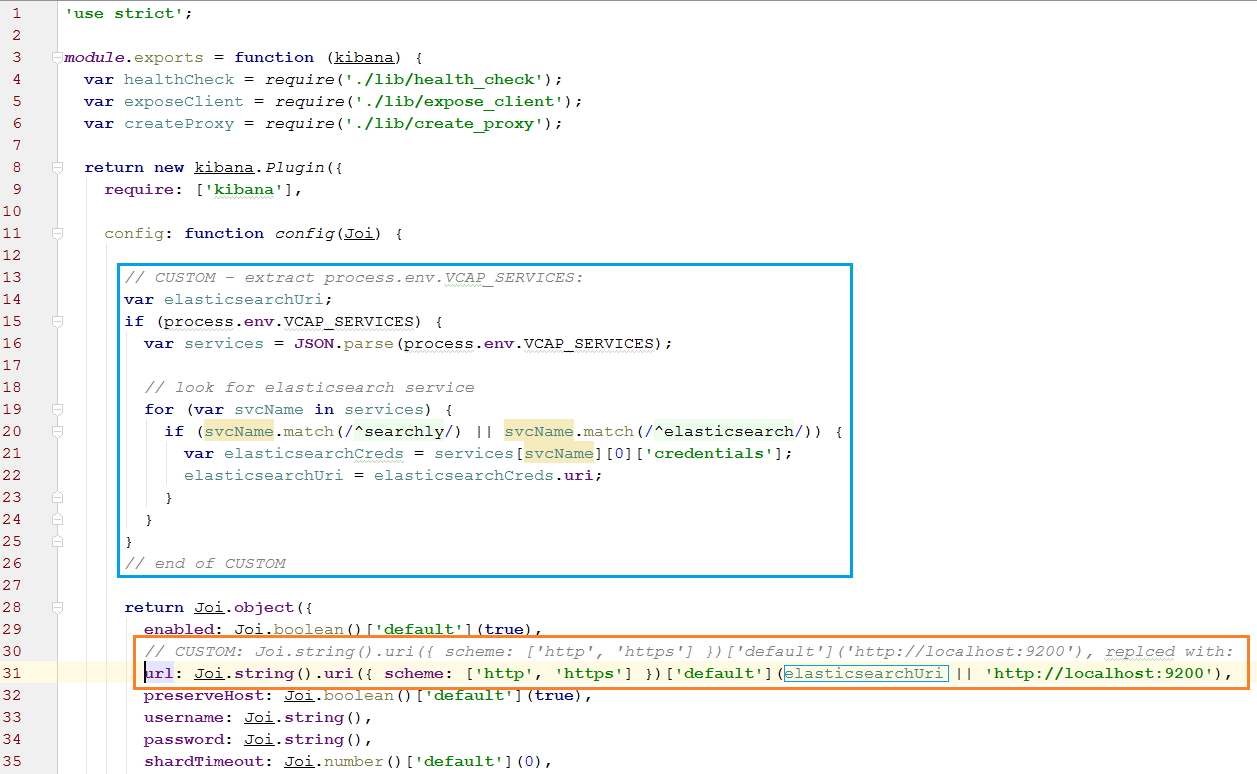
Again, the idea of the change is to retrieve the Elasticsearch URL value from the environment variable set by Bluemix for the application and use this value as default when the elasticsearch.url property is not set in the configuration file.
With this change, you also should not define elasticsearch.url in the configuration file when deploying the Kibana package to Bluemix.
Kibana configuration
To run Kibana, you need to set its configuration properties. So, before deploying the Kibana package to Bluemix, change the ./config/kibana.yml file with your settings. For my example, I’ve set the following:
1 2 3 | # Kibana uses an index in Elasticsearch to store saved searches, visualizations # and dashboards. It will create a new index if it doesn't already exist. kibana.index: ".kibana" |
1 2 | # The default application to load. kibana.defaultAppId: "discover" |
1 2 3 | # Time in milliseconds to wait for responses from the back end or elasticsearch. # This must be > 0 elasticsearch.requestTimeout: 300000 |
1 2 3 | # Time in milliseconds for Elasticsearch to wait for responses from shards. # Set to 0 to disable. elasticsearch.shardTimeout: 30000 |
If you use an Elasticsearch instance (not a built-on-top service like I do), you should additionally set the elasticsearch.url property. For example:
1 2 | # The Elasticsearch instance to use for all your queries. elasticsearch.url: "http://localhost:9200" |
Note: Do not set the server.port property to make Kibana use the port assigned to the application by Bluemix as described in the Kibana port section. If you need, you can specify other Kibana properties in the configuration file.
Cloud Foundry manifest
For deploying the application to Bluemix, create the manifest.yml file in the application root directory:
---
applications:
- name: kibana431
  command: node src/cli
The command property should contain the start command for an application. For Kibana, you can get this command from its start script: ./bin/kibana.
Deploying Kibana to Bluemix
When the Kibana package is ready to be deployed to Bluemix, execute the following command from its root directory:

Wait until Cloud Foundry finishes uploading the Kibana package.

Then, you’ll see that Cloud Foundry stops the application and tries to start it using your package.

Wait again.
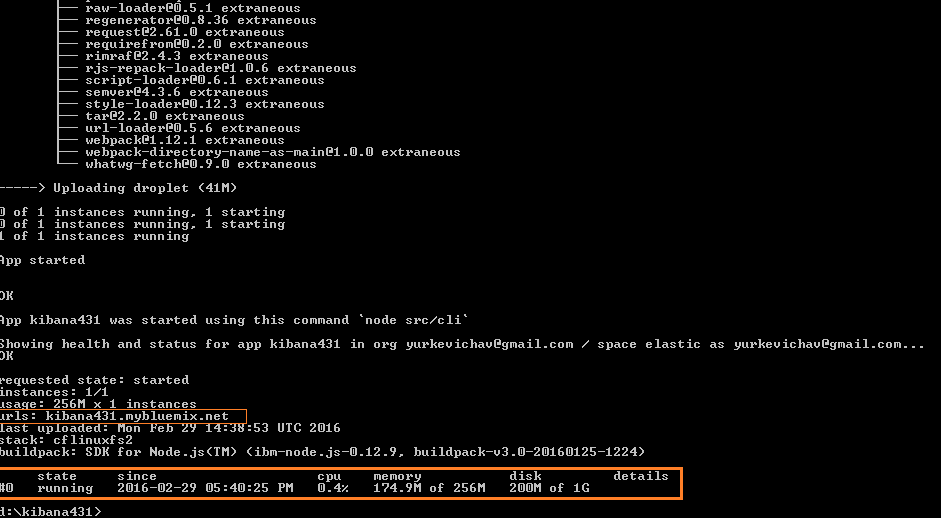
Note that the application URL is printed out in the console during deployment. Access the Kibana application with this URL.
Because I haven’t populated Elasticsearch with any data yet, Kibana shows nothing at the moment.
Exploring data with Kibana
To see some sample data in Kibana, I need to populate Elasticsearch provided by the Searchly service. For doing this, I’m going to create an index and use the Elasticsearch APIs to post data to the index.
On the Searchly dashboard, I add a new index.
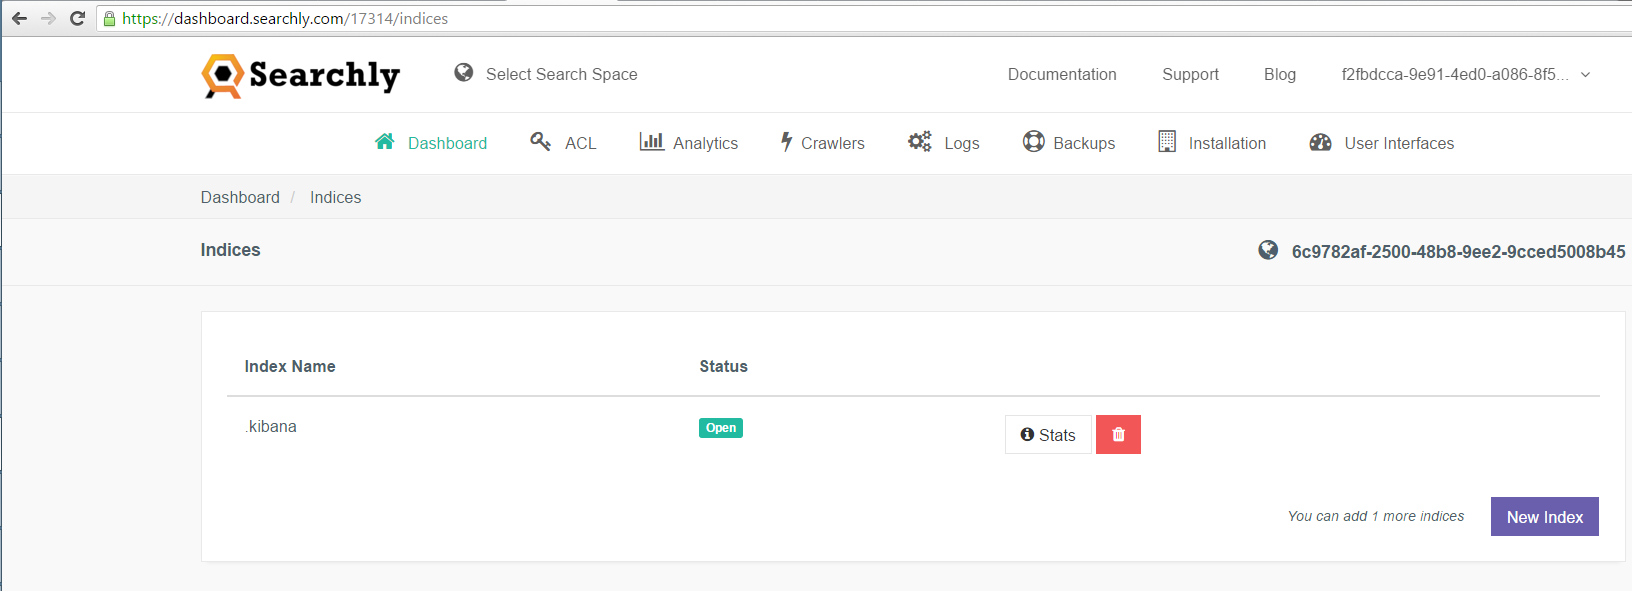
Note that it already has the .kibana index generated by Kibana itself. So, I create the items index to store sample data.
Then, I execute some curl requests in the command line to post data to the items index:
1 | curl -XPOST "<strong>http://bluemix:403dae2d2047554f2aaf544dce1b5657@dori-us-east-1.searchly.com</strong>/items/item/" -d "{\"message\" : \"Check out Elasticsearch\",\"post_date\" : \"2016-02-24T15:03:05\"}" |
1 | curl -XPOST "http://bluemix:403dae2d2047554f2aaf544dce1b5657@dori-us-east-1.searchly.com/items/item/" -d "{\"message\" : \"Check out Elasticsearch second time\",\"post_date\" : \"2016-02-24T12:21:07\"}" |
1 | curl -XPOST "http://bluemix:403dae2d2047554f2aaf544dce1b5657@dori-us-east-1.searchly.com/items/item" -d "{\"message\" : \"Check out Elasticsearch again\",\"post_date\" : \"2016-02-24T12:26:12\"}" |
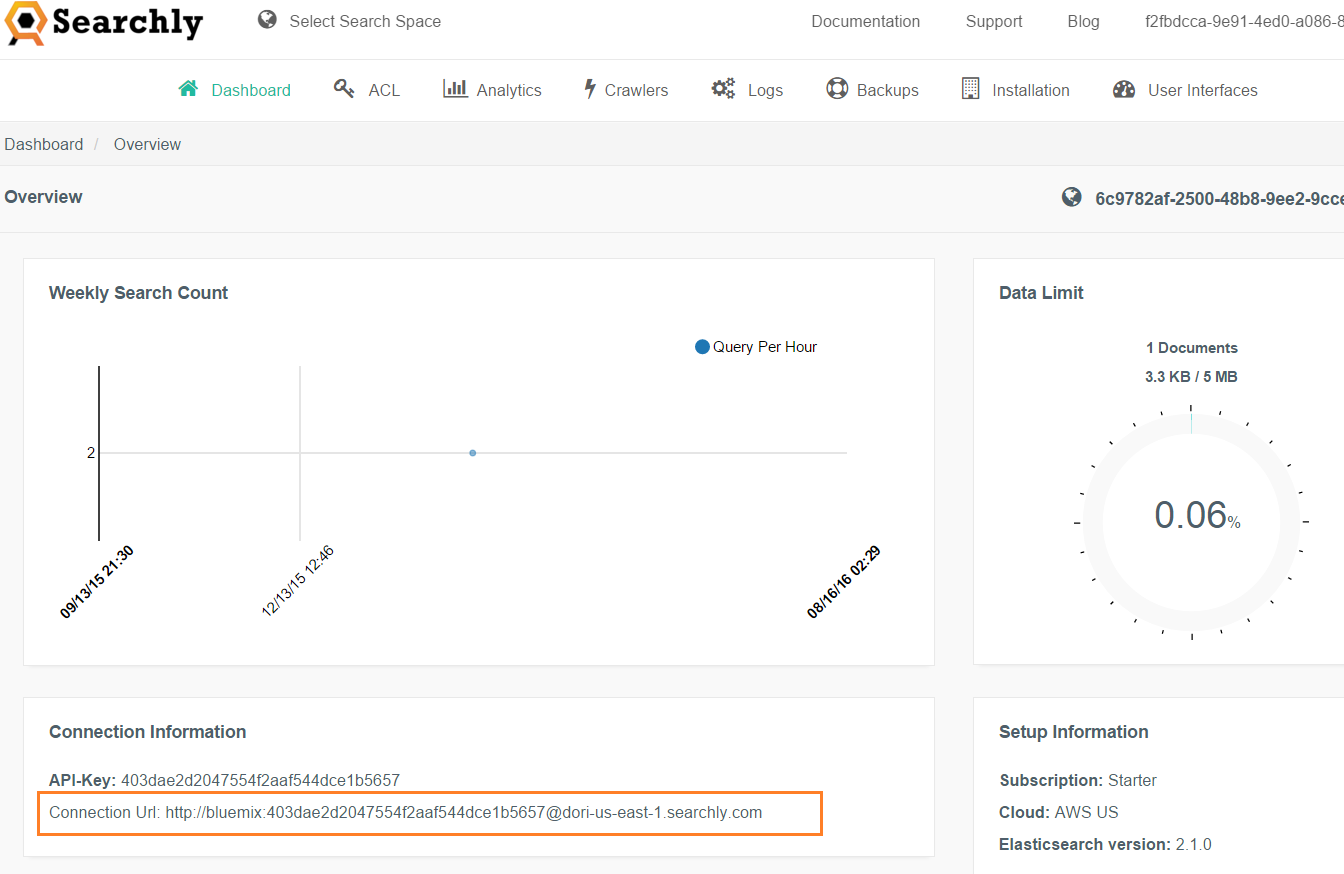
If you are doing similar requests, make sure to use the URL of your Elasticsearch. For the Searchly service, the URL is printed on the Searchly dashboard.
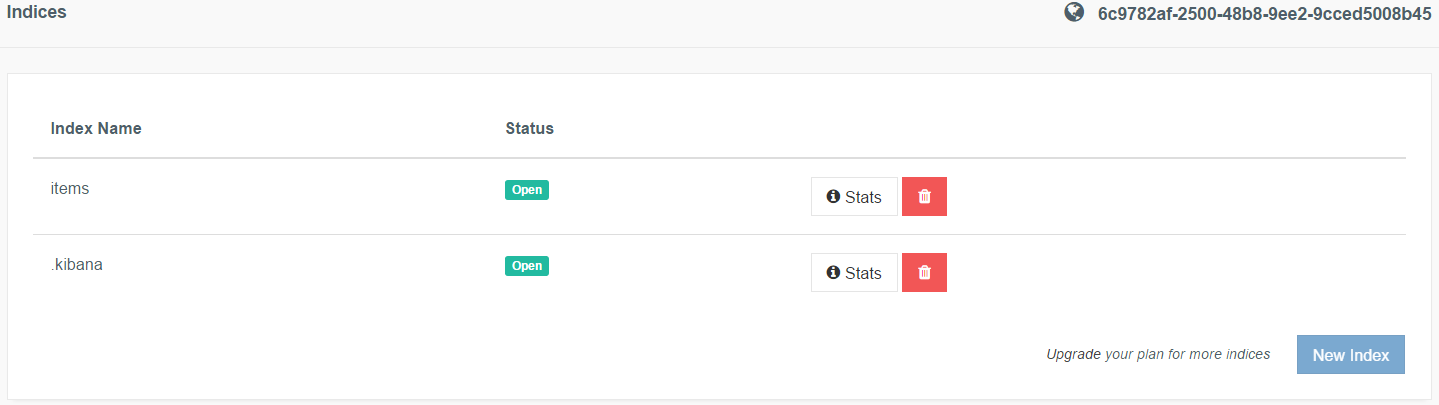
After the curl commands are completed, check the index content on the Dashboard.
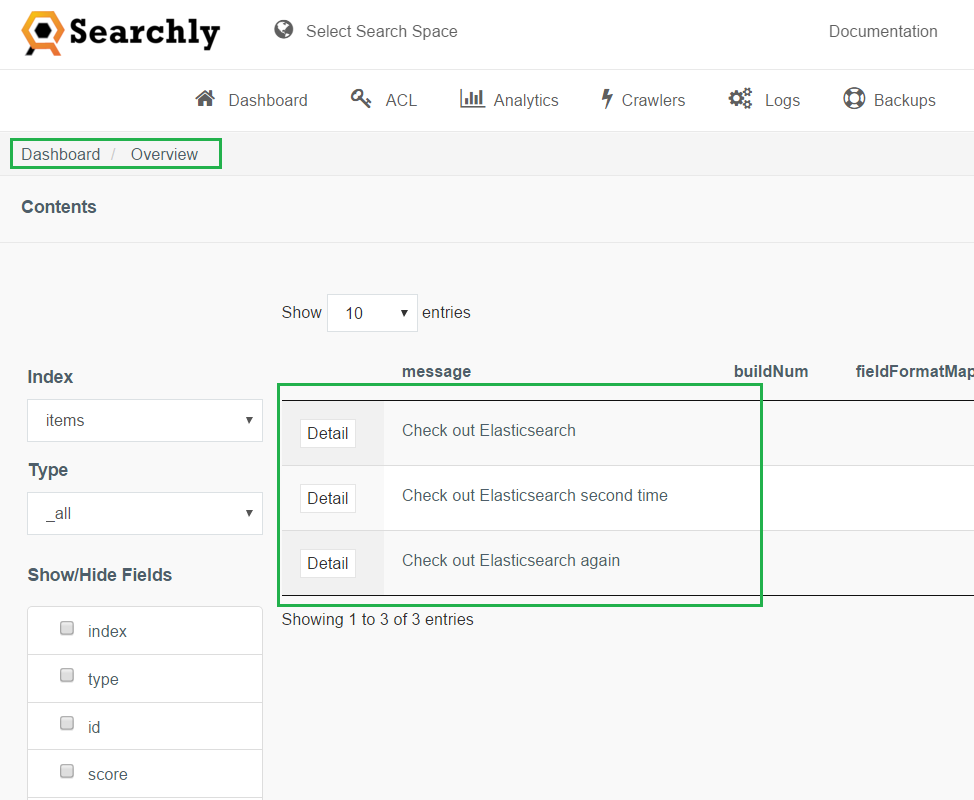
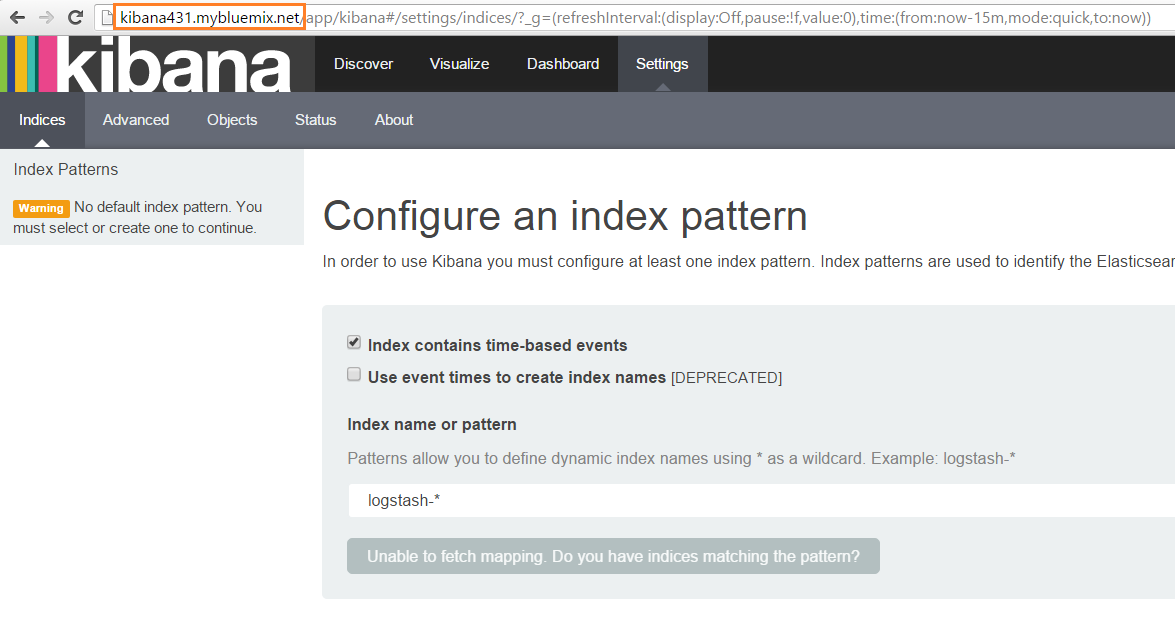
Then, check the messages in Kibana. To see them, configure an index pattern.
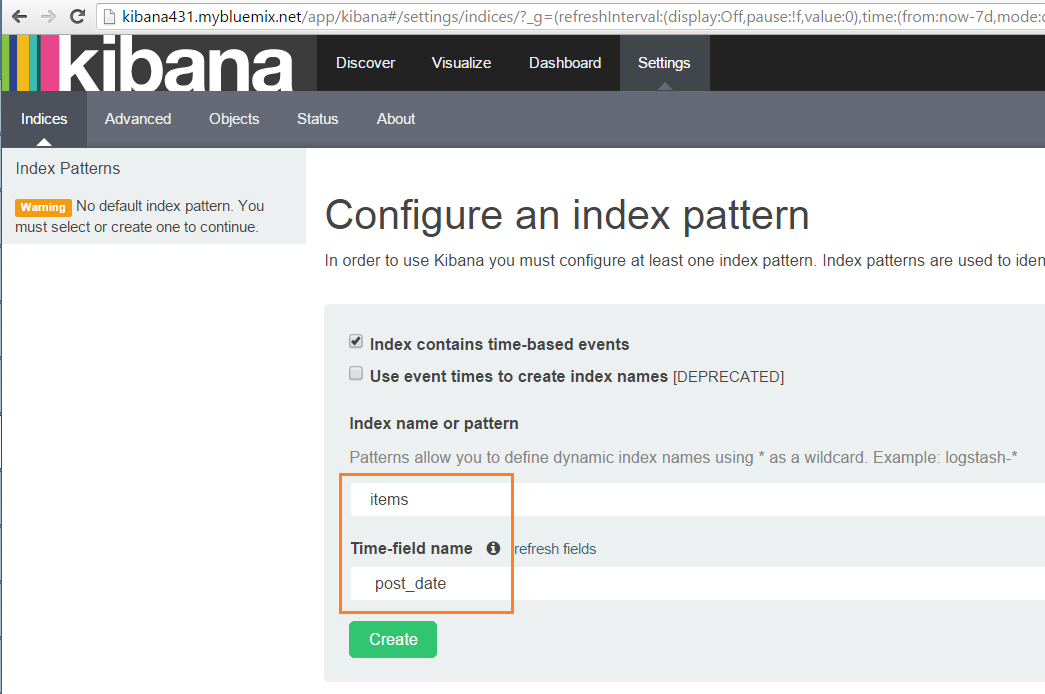
Inspect the Discover page where you’ll see the messages.
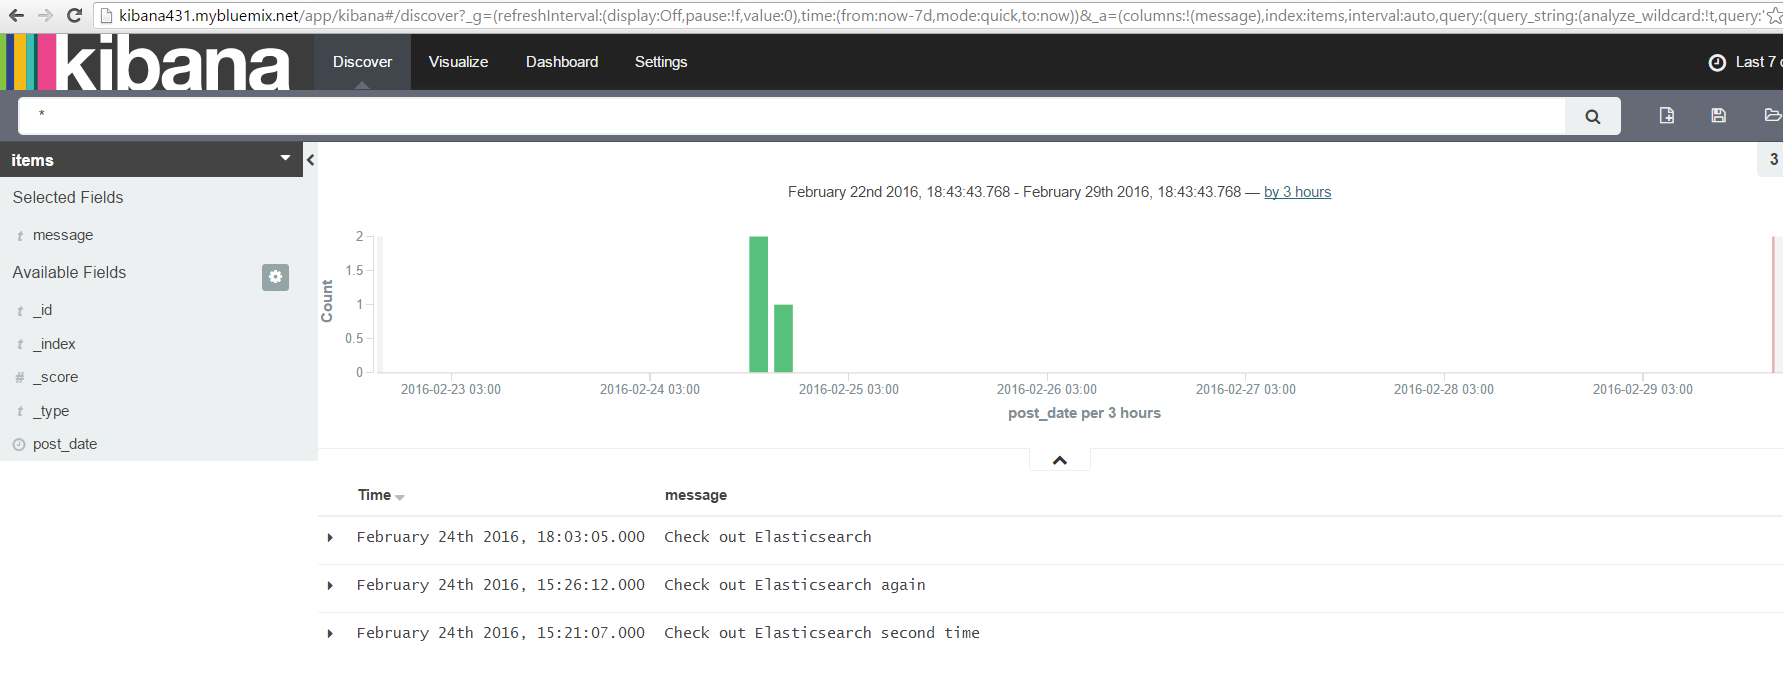
Do not forget to adjust the Kibana time filter.
For step-by-step guidance on how to work with Kibana in Bluemix, refer to Kibana on IBM Bluemix: How to Deploy and Use for Visualization of Elasticsearch Data. The paper provides instructions on how to set up your Bluemix environment, configure Elasticsearch, and then deploy Kibana to Bluemix for exploring Elasticsearch data.